In our previous blog post, we talked about how to set up your object storage PILW.IO Vault in 4 easy steps. In this article, we will explain how you can set up services in PILW.IO and NextCloud use cases will be our case. The easy setup will show how virtual machines can be used in combination with PILW.IO Vault object storage.
What is Nextcloud
Nextcloud is on-premises collaboration platform which enables you to protect your data and share it with colleagues, family or friends. It offers you experience which is similar to Dropbox or Google Drive, yet leaving the full control to you. You can manage the whole instance, users and you are in control of your business-critical data or even family photo album.
Setting Up Nextcloud in PILW.IO
We set up Nextcloud instance to run on VM on PILW.IO platform, run Nextcloud as Docker container and utilise PILW.IO Storage Vault to store data. Here is a list of things you need to install during the case study:
- MariaDB database
- Redis in-memory data structure store for caching
- Letsencrypt certification management
- Apache web server
- NginX load balancer
- Nextcloud application
The container approach would enable the solution to deploy on top of various nodes and might give you the possibility to scale the solution. However, there is another simplicity that container would provide you. For example, you can deploy the instance in somewhere else. Remember, you are in control of your data.
What You Need
Before the setup, you need to prepare a couple of things;
- A virtual machine to run Nextcloud instance
- Valid domain name
- Pilw.io Vault access key pair
- Pilw.io Vault storage
Let’s explain these requirements a bit more detailed.
You should have access to PILW.IO environment and virtual machine set up for running your Nextcloud instance. The size of the virtual machine depends on how many users and how much data you would like to store there. For our case study, we will have a small setup with the following resources:
Number of vCPU: 1
Memory in GB: 1
Disk size in GB: 20
This should be enough to run perhaps five users, or rather for a small company. If you want to run Nextcloud for testing purposes only, this can also be the perfect size for you.
For a larger group of people or bigger organisations you should consider the VM setup below;
Number of vCPU: 4
Memory in GB: 4
Disk size in GB: 40
If you suspect the latter one to be too big, anything in between would be ok as well. Just keep an eye on your VM resource consumption. Try not to go lower than 20GB for the disk size.
As an operating system for the VM, we have selected Ubuntu 16.04LTS. It will work as well in Ubuntu 18.04LTS, or any other flavour of Linux. Any platform that is able to run Docker Engine is also suitable. Another advantage of running NextCloud in a container is that you are not dependent on any OS platform.
The second thing you need is a valid and registered domain name. The setup is using LetsEncrypt certification management to run Nextcloud with secured HTTPS protocol. LetsEncrypt needs to have a registered valid domain name to work properly. If you do not have a domain name registered, please contact us at support@pilw.io.
In the example, we will use ncdemo.pilw.io. You can use a fully qualified domain name for the server with your own or company domain name. You might need to talk to your network administrators to prepare the domain name for the Nextcloud server.
You have set up the access to pilw.io Storage Vault and you have credentials (key pairs) available. If you do not know where to obtain these, you can get more information in our previous blog article. Here in the first part, you can learn how to obtain the PILW.IO Storage Vault key pair.
A bucket in PILW.IO Storage Vault will be holding your data. You can get instructions about how to create PILW.IO Vault bucket from our previous blog post. The PILW.IO Vault does not need to be with any capacity defined, as it is just object storage. You can read more about object storage from the blog post we had earlier about pilw.io Vault storage.
For this demonstration, we have prepared a storage in PILW.IO Storage Vault and named it “nextcloud-demo”. If you prepare a storage try to give a unique name.
Prepare Your VM
Within the next steps, we will prepare the virtual machine for our Nextcloud deployment. You can see the created VMs below.
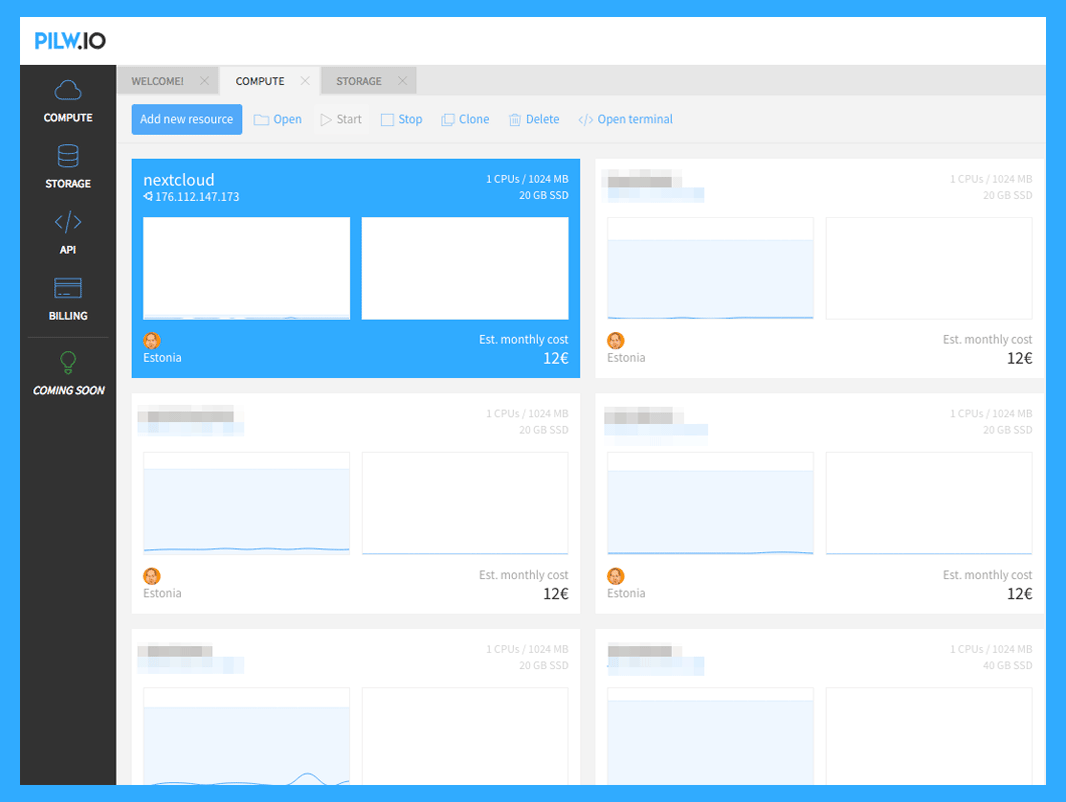
We have a virtual machine named nextcloud and it has an IP address 176.112.147.173. We can log in to the virtual machine with SSH or we can open terminal right in the browser window within PILW.IO environment.
Logging in to a newly created server, there is a warning about that the environment has an invalid locale setting. The message looks like this:
WARNING! Your environment specifies an invalid locale.
 The unknown environment variables are:
   LC_CTYPE=UTF-8 LC_ALL=
 This can affect your user experience significantly, including the
 ability to manage packages. You may install the locales by running:

   sudo apt-get install language-pack-UTF-8
     or
   sudo locale-gen UTF-8

To see all available language packs, run:
   apt-cache search "^language-pack-[a-z][a-z]$"
To disable this message for all users, run:
   sudo touch /var/lib/cloud/instance/locale-check.skip
It is recommended to fix the locale settings, as it is needed for python components to run properly. The locale settings in Ubuntu are in the file /etc/default/locale. Make sure you use superuser to do command to edit the file.
~$ sudo nano /etc/default/localeAdd following lines to the end of the file:
LANGUAGE="en_US.UTF-8"
LC_ALL="en_US.UTF-8"
Now you just need to log out and log back in for changes to take effect.
The operating system patches can be installed in Ubuntu very easily with the following command.
~$ sudo apt-get update && sudo apt-get upgrade -yThe command might take a few minutes to run and there is a lot of information screened during the process. Next important thing to install is the NTP client. NTP is the Network Time Protocol, enabling servers to synchronise time from internal or external services. NTP is needed for different services and log mechanisms to have the same clock within the system. NTP can be installed with the following command:
~$ sudo apt-get install ntp -yAnd can be checked with:
~$ ntpq -pThe result of the command is the list of servers to obtain time from and what is a difference compared to these. When there is a big difference, the time will catch up over time (the catch-up parameter is of course adjustable).
We need to install Docker engine to the system. But before getting there, let’s check the Python version. The recommended version is python 3. It can be checked with the following command:
~$ python3 --version
Python 3.5.2
In our case, the version 3.5.2 is installed and that should be good enough. If Python is not installed, you can install it with
code>~$ sudo apt-get install python3
As we won’t be installing any other version of Python, we should be good. Otherwise, we might need to link the python command to issue pyhton3 instead of python2.7.
When Python versions and libraries are good, we can go ahead with Docker engine installation. We are using Docker CE, the community edition in here. This will do ok for the purpose here. The easiest way is to install Docker engine from Ubuntu repository:
~$ sudo apt install docker.io -yDepending on your need, the Docker can be installed also directly from Docker repositories. You can even install nightly builds of Docker engine to keep most recent versions of it. However, if you run your Nextcloud service in production, the nightly builds are not the best idea to go for. Although in most cases these are working fine.
When installed, we can check the version of Docker engine that was installed.
~$ docker --version
Docker version 17.03.2-ce, build f5ec1e2
Now let’s make sure the Docker engine will be started every time we reboot our server
$ sudo systemctl start docker
$ sudo systemctl enable docker
In a multi-container environment, it will be easier to use docker-compose command. To put it shortly, this is Docker container environment management CLI. The easy way is to install docker-compose from Python repositories with pip command. But first, we need to install pip command to our system.
~$ sudo apt-get install python3-pip -y
Once done, we can install the docker-compose
~$ sudo pip3 install docker-compose
~$ docker-compose --version
docker-compose version 1.22.0, build f46880f
Now the challenge with Docker is that by default the Docker commands are set to run by superuser only. So when in example running docker ps command, the response will be something like this:
~$ docker ps
Got permission denied while trying to connect to the Docker daemon socket at unix:///var/run/docker.sock: Get         http://%2Fvar%2Frun%2Fdocker.sock/v1.27/containers/json: dial unix /var/run/docker.sock: connect: permission denied
We can fix it to add existing user to docker group.
~$ sudo usermod -a -G docker $USER$USER is system variable, which represents the current user you are logged in with. This will enable us to run Docker commands under our own user. Change to take effect, you need to log out and log back in again. docker ps command should have different output now.
~$ docker ps
CONTAINER ID        IMAGE               COMMAND             CREATED             STATUS              PORTS               NAMES
As we do not have any containers running at the moment, we have just table headers seen here. Don’t worry, we will fix it shortly. But with that, we have completed the VM preparation.
Prepare for building containers
Now we can start deploying our nextcloud instance. We have prepared a package which contains all necessary files to build the Nextcloud data management environment. First, you need to download the package.
~$ wget https://s3.pilw.io:8080/publicread/files/nextcloud.tarAfter that, you need to extract the package with tar command as follows.
~$ tar xvf nc_build.tar
nc_build/
nc_build/db.env
nc_build/docker-compose.yml
nc_build/proxy/
nc_build/proxy/uploadsize.conf
nc_build/proxy/Dockerfile
nc_build/app/
nc_build/app/objectstore.config.php
nc_build/app/redis.config.php
nc_build/app/Dockerfile
As a result, you have a new directory called nc_build. Let’s change to the directory and make some configuration changes.
~$ cd nc_buildAs we will use docker-compose to set up the Nextcloud, we need YAML file with describing the service. With that Docker engine knows what images we need, what are the configuration settings, what volumes and network we need for the Nextcloud to set it up. YAML itself is human and program languages readable serialisation file. With help of YAML as a human can simply describe to programs what he/she wants these to do and programs are able to understand and get it done. We have docker-compose.yml file which has few sections and we need to do some changes to the file.
~/nc_build$ nano docker-compose.ymlIn the beginning, we have version description. For Docker Compose we need to use version 3. You can read about YAML versions and Docker compatibility in here.
In our YAML file we have three main sections:
services– we describe what are the services we need to runvolumes– we define the volumes we need to store our persistent data. Containers by nature are stateless, thus no information persistently stored there. The data will be gone whenever the container is shut down. Therefore we need to specify separate volumes, where containers will store data and it will be available again after container restart or update.networks– we define the network configuration for the services.
Breaking these apart now we first describe all the services we need. For Nextcloud to store various data about users and files, we need a database. We use MariaDB for Nextcloud database.
We can cover all sections in YAML but for sure you are in urge to get Nextcloud deployed! In our next blog posts, we will be covering the explanations of YAML and detailisation of components.
The first thing we need to assign the password for MySQL user. MariaDB is a spin-off from MySQL after Oracle acquisition, hence the similarities between the SQL commands and variable names. You need to provide value to the following variable in db section:
- MYSQL_ROOT_PASSWORD=Please select the password which is complicated to guess and secure. With this user, you can pretty much do anything with the database. The important part in the docker-compose.yml file at db section is also the variable file description db.env, where some other important variables should be changed. We will cover this part later below herewith.
In app section of the file we have stated where wt can get information about the application (Nextcloud) itself. We read this information from files in app directory. But first we need to provide some variables in the section.
- VIRTUAL_HOST=ncdemo.pilw.io
- LETSENCRYPT_HOST=ncdemo.pilw.io
These variables should be the same. I.e. the fully qualified domain name of your nextcloud server. This is the domain name that we describe above. In our case, the domain name ncdemo.pilw.io is used. In example to your case the name could be nextcloud.yourcompany.com. This is needed for LetsEncrypt to be able to create proper certificates for your server and enable secure HTTPS access to your Nextcloud instance. The last variable you need to chance is:
- LETSENCRYPT_EMAIL=mydemoaccount@pilw.ioYou must use valid email address there. It can be your administrators or network administrators email address. Or it can be your own email address. Do not use fake email address there. When done, you can save the changes in the document and close it.
You can go through the other sections as well in the docker-compose.yml file. But we leave it for now and let’s get back to database environment variables that are in the file db.env.
~/nc_bulid$ nano db.envIn the file we provide the name for the database as nextcloud and create nextcloud admin user for the database. Of course you can change these values according to your need. In addition, you need to specify a password for the admin user. Again, select a password which is not easy to guess. With that, we should have database configurations done. You can save and close the file.
In proxy directory we have two files:
~/nc_build$ ls -1 proxy
Dockerfile
uploadsize.conf
The uploadfilesize.conf will describe the proxy limitation of maximum file size that can be uploaded to Nextcloud. Feel free to change this parameter per your needs. Dockerfile is the instructions file telling to docker how to build the proxy container. As we use docker-compose, we can adjust the application configuration with describing the Dockerfile. With the description herewith we just tell to NginX proxy to define the maximum file size value as 10GB, which we can upload at once to instance.
The other directory is app, where we have Nextcloud application-specific configurations.
~/nc_build$ ls -1 app
Dockerfile
objectstore.config.php
redis.config.php
There we have a few files, out of which we need to change one – objectstore.config.php. We need to tell to Nextcloud where we are going to store our files. We will use PILW.IO Storage Vault for storing our files, meaning we need to define endpoint, container name and access credentials to store our data.
~/nc_build$ nano app/objectstore.config.phpIn the file we need to provide values to the arguments bucket, key and secret. For this example, we had a bucket nextcloud-demo , our key to access the bucket is N7BF015F9WV27RU3YR9R and secret is 08csxUmWqL1gdqLaZSvcswDw6f9xPjfkux9sZ3Zj. Guidelines for you to get your access key and secret are available in our previous blog post. So in example we need to change the values for these argument variables:
...
'bucket' => 'nextcloud-demo',
'key' => 'N7BF015F9WV27RU3YR9R',
'secret' => '08csxUmWqL1gdqLaZSvcswDw6f9xPjfkux9sZ3Zj',
...
The rest of required parameters has been set already. Just save the file and close it.
When creating the images, the file will be copied to persistent volume with Nextcloud configuration directory config/ and file contents will be copied to Nextcloud config file config/config.php. Once container will be started, the Nextcloud app will read the configuration file from config/config.php and runs according to the configuration setup. Persistent volume guarantees, that we have configuration setting every time the same when container starts or restarts.
Build and Deploy Containers
The boring part is over now and fun part starts! Finally. We have prepared the virtual machine and docker configuration files. Firstly we need to download and build images. With docker-compose command it is very easy. The command downloads all necessary components and modules to build images. It takes few minutes to run. The output of the command should look like this:
~/nc_build$ docker-compose build --pull
redis uses an image, skipping
db uses an image, skipping
Building cron
Step 1/3 : FROM nextcloud:apache
apache: Pulling from library/nextcloud
be8881be8156: Pull complete
69a25f7e4930: Pull complete
*
*
*
Status: Downloaded newer image for nextcloud:apache
 ---> 7f1252d25c03
Step 2/3 : COPY redis.config.php /usr/src/nextcloud/config/redis.config.php
 ---> 32c35e6d38f8
Removing intermediate container 1d9e9a220afd
Step 3/3 : COPY objectstore.config.php /usr/src/nextcloud/config/objectstore.config.php
 ---> 5f1ccfd6fd5f
Removing intermediate container 73a14a6d0dfa
Successfully built 5f1ccfd6fd5f
Building proxy
Step 1/2 : FROM jwilder/nginx-proxy:alpine
alpine: Pulling from jwilder/nginx-proxy
911c6d0c7995: Pull complete
d0c5e0e017dc: Pull complete
*
*
*
 ---> 3c2d39799f8e
Step 2/2 : COPY uploadsize.conf /etc/nginx/conf.d/uploadsize.conf
 ---> 4401415dd0f5
Removing intermediate container 07f3589b3490
Successfully built 4401415dd0f5
letsencrypt-companion uses an image, skipping
Building app
Step 1/3 : FROM nextcloud:apache
apache: Pulling from library/nextcloud
*
*
*
Status: Image is up to date for nextcloud:apache
  ---> 7f1252d25c03
Step 2/3 : COPY redis.config.php /usr/src/nextcloud/config/redis.config.php
 ---> Using cache
 ---> 32c35e6d38f8
Step 3/3 : COPY objectstore.config.php /usr/src/nextcloud/config/objectstore.config.php
 ---> Using cache
 ---> 5f1ccfd6fd5f
Successfully built 5f1ccfd6fd5f
Now we should have all images prepared. We can confirm it with command;
~/nc_build$ docker images
REPOSITORY            TAG                 IMAGE ID            CREATED             SIZE
nc_build_proxy        latest              4401415dd0f5        2 minutes ago       54.2 MB
nc_build_app          latest              5f1ccfd6fd5f        2 minutes ago       553 MB
nc_build_cron         latest              5f1ccfd6fd5f        2 minutes ago       553 MB
jwilder/nginx-proxy   alpine              3c2d39799f8e        3 days ago          54.2 MB
nextcloud             apache              7f1252d25c03        11 days ago         553 MB
All our images are nicely downloaded and created. Now, since we have all images we can start to deploy our containers. We use again docker-compose command to build containers from images and run these. We will use two flags with the command: -p nextcloud, this way we will tell to Docker engine that we will use name nextcloud for the project. Without the option, name of the project will be taken from the directory name, which in our case would be nc_build. -d, means we run these containers in detached mode. It means containers will be started and left running in a background.
~/nc_build$ docker-compose -p nextcloud up -d
Creating network "nextcloud_proxy-tier" with the default driver
Creating network "nextcloud_default" with the default driver
Creating volume "nextcloud_db" with default driver
Creating volume "nextcloud_vhost.d" with default driver
Creating volume "nextcloud_certs" with default driver
Creating volume "nextcloud_nextcloud" with default driver
Creating volume "nextcloud_html" with default driver
Pulling db (mariadb:)...
latest: Pulling from library/mariadb
c64513b74145: Pull complete
01b8b12bad90: Pull complete
*
*
*
Status: Downloaded newer image for mariadb:latest
Pulling redis (redis:)...
latest: Pulling from library/redis
be8881be8156: Already exists
d6f5ea773ca3: Pull complete
*
*
*
Status: Downloaded newer image for redis:latest
Building app
Step 1/3 : FROM nextcloud:apache
 ---> 7f1252d25c03
Step 2/3 : COPY redis.config.php /usr/src/nextcloud/config/redis.config.php
 ---> Using cache
 ---> 32c35e6d38f8
Step 3/3 : COPY objectstore.config.php /usr/src/nextcloud/config/objectstore.config.php
 ---> Using cache
 ---> 5f1ccfd6fd5f
Successfully built 5f1ccfd6fd5f
WARNING: Image for service app was built because it did not already exist. To rebuild this image you must use `docker-compose build` or `docker-  compose up --build`.
Building cron
Step 1/3 : FROM nextcloud:apache
 ---> 7f1252d25c03
Step 2/3 : COPY redis.config.php /usr/src/nextcloud/config/redis.config.php
 ---> Using cache
 ---> 32c35e6d38f8
Step 3/3 : COPY objectstore.config.php /usr/src/nextcloud/config/objectstore.config.php
 ---> Using cache
 ---> 5f1ccfd6fd5f
Successfully built 5f1ccfd6fd5f
WARNING: Image for service cron was built because it did not already exist. To rebuild this image you must use `docker-compose build` or `docker-compose up --build`.
Building proxy
Step 1/2 : FROM jwilder/nginx-proxy:alpine
 ---> 3c2d39799f8e
Step 2/2 : COPY uploadsize.conf /etc/nginx/conf.d/uploadsize.conf
 ---> Using cache
 ---> 4401415dd0f5
Successfully built 4401415dd0f5
WARNING: Image for service proxy was built because it did not already exist. To rebuild this image you must use `docker-compose build` or `docker-compose up --build`.
Pulling letsencrypt-companion (jrcs/letsencrypt-nginx-proxy-companion:)...
latest: Pulling from jrcs/letsencrypt-nginx-proxy-companion
8e3ba11ec2a2: Pull complete
*
*
*
Status: Downloaded newer image for jrcs/letsencrypt-nginx-proxy-companion:latest
Creating nextcloud_proxy_1 ... done
Creating nextcloud_db_1    ... done
Creating nextcloud_redis_1 ... done
Creating nextcloud_letsencrypt-companion_1 ... done
Creating nextcloud_app_1                   ... done
Creating nextcloud_cron_1                  ... done
This command builds now described networks, volumes and containers. Copies necessary configuration files to proper location in containers and start the containers. At the end of command output we would want to see green done for successful container start. We can see containers status with following command (the command output lines are a bit too long for the doc herewith).
~/nc_build$ docker ps
CONTAINER ID        IMAGE                                    COMMAND                  CREATED             STATUS              PORTS                                      NAMES
132313cfe0b2        nextcloud_cron                           "/cron.sh"               18 minutes ago      Up 18 minutes       80/tcp                                        nextcloud_cron_1
9ee5c94f7bbb        nextcloud_app                            "/entrypoint.sh ap..."   18 minutes ago      Up 18 minutes       80/tcp                                     nextcloud_app_1
1a286a770aa7        jrcs/letsencrypt-nginx-proxy-companion   "/bin/bash /app/en..."   18 minutes ago      Up 18 minutes                                                  nextcloud_letsencrypt-companion_1
b8109fd34dd4        redis                                    "docker-entrypoint..."   18 minutes ago      Up 18 minutes       6379/tcp                                   nextcloud_redis_1
24176931ce63        mariadb                                  "docker-entrypoint..."   18 minutes ago      Up 18 minutes       3306/tcp                                   nextcloud_db_1
030690be38fb        nextcloud_proxy                          "/app/docker-entry..."   18 minutes ago      Up 18 minutes       0.0.0.0:80->80/tcp, 0.0.0.0:443->443/tcp   nextcloud_proxy_1
In our future blog posts, we will explain the outputs of these commands in detail. But for now we need to know that we have containers up and running and our service should be running also. To test it, we need to direct the web browser to the address or domain name created above herewith. If all is good, you will be asked to create admin account for the service, as seen in the screenshot below.
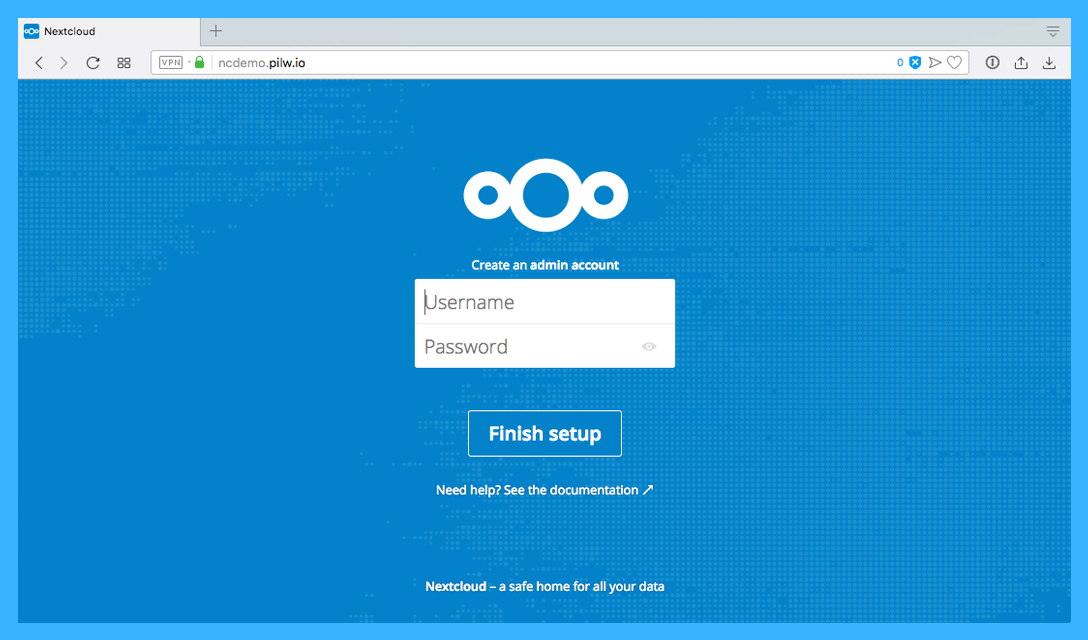
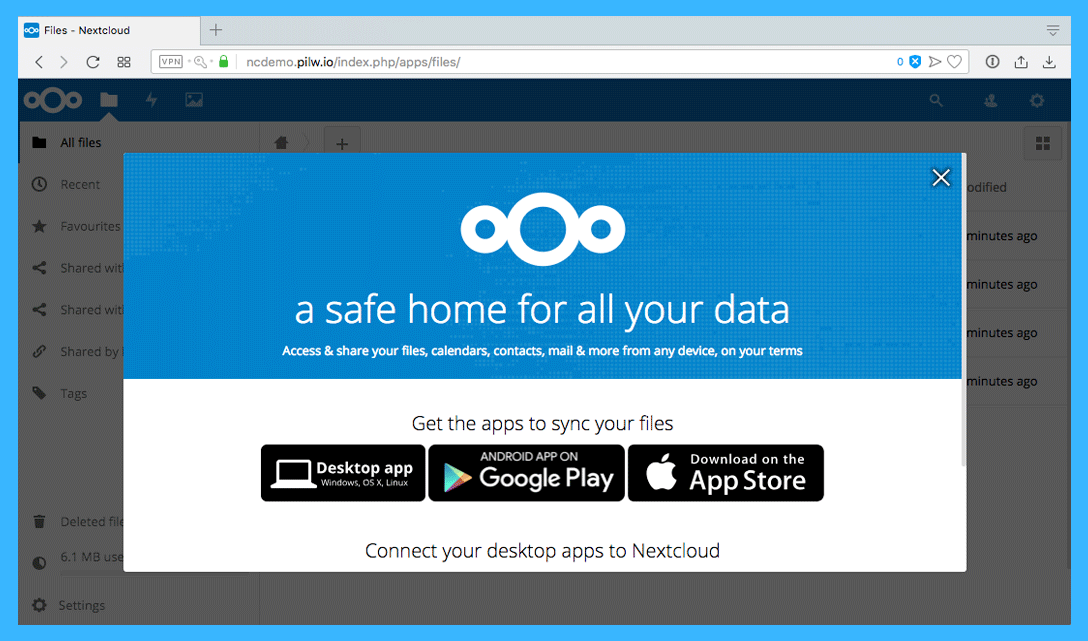
Creating username and password here will start the Nextcloud instance installation completion. This will be running about couple of minutes and with success, the newly created user will login and you can start to configure your Nextcloud instance. The browser should show you something like seen in next screenshot. Congratulations!
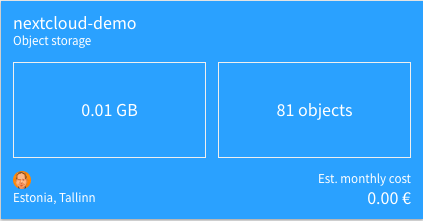
Now, let’s take a look at our PILW.IO Vault status. It shows us that we are using the Vault container for worth of 0,01GB and we have in our example 81 objects stored here.
These are the files stored by the default user. Deleting these will reduce the object count in the Vault too. The files are stored in the Vault not with very classical way. The filenames are a bit cryptic there, showing something like urn:oid:11.
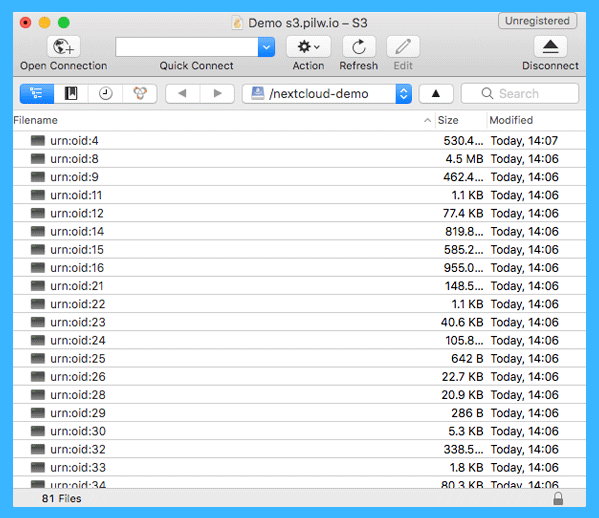
Although file names are cryptic, the file contents are not. You can enable file encryption by Nextcloud admin to get encryption for the file contents too.
In conclusion, you have now set up the Nextcloud instance with all necessary components to run it in PILW.IO and using PILW.IO Vault storage to store data.
In our future blog posts, we will go through some of the automations to make set up processes easier.