This tutorial will use Pilvio-s Mikrotik image from App Catalogue to create Virtual Machine. Tutorial can be completed on all operating systems but for our example, we are going to use CentOS version 7. First thing after creating VM, log in and mount tmpfs to /tmp.
 Once we finished, we press the Apply Configuration. After that, we do all the basic settings either through Terminal, Webfig, or Winbox (which can be found on the manufacturer’s website https://mikrotik.com/download).
mount -t tmpfs tmpfs /tmp/Next we become a root user and download the applications we need for work.
sudo -i
yum install wget unzip -y
Next step we go to the tmp directory and download the router image.
cd /tmp
wget https://download.mikrotik.com/routeros/6.47.8/chr-6.47.8.img.zip
Then fetch the image of the router and write it to the virtual machine disk.
unzip chr-6.47.8.img.zip
dd if= chr-6.47.8.img of=/dev/vda bs=4M oflag=sync
Now we initialize a hard reboot.
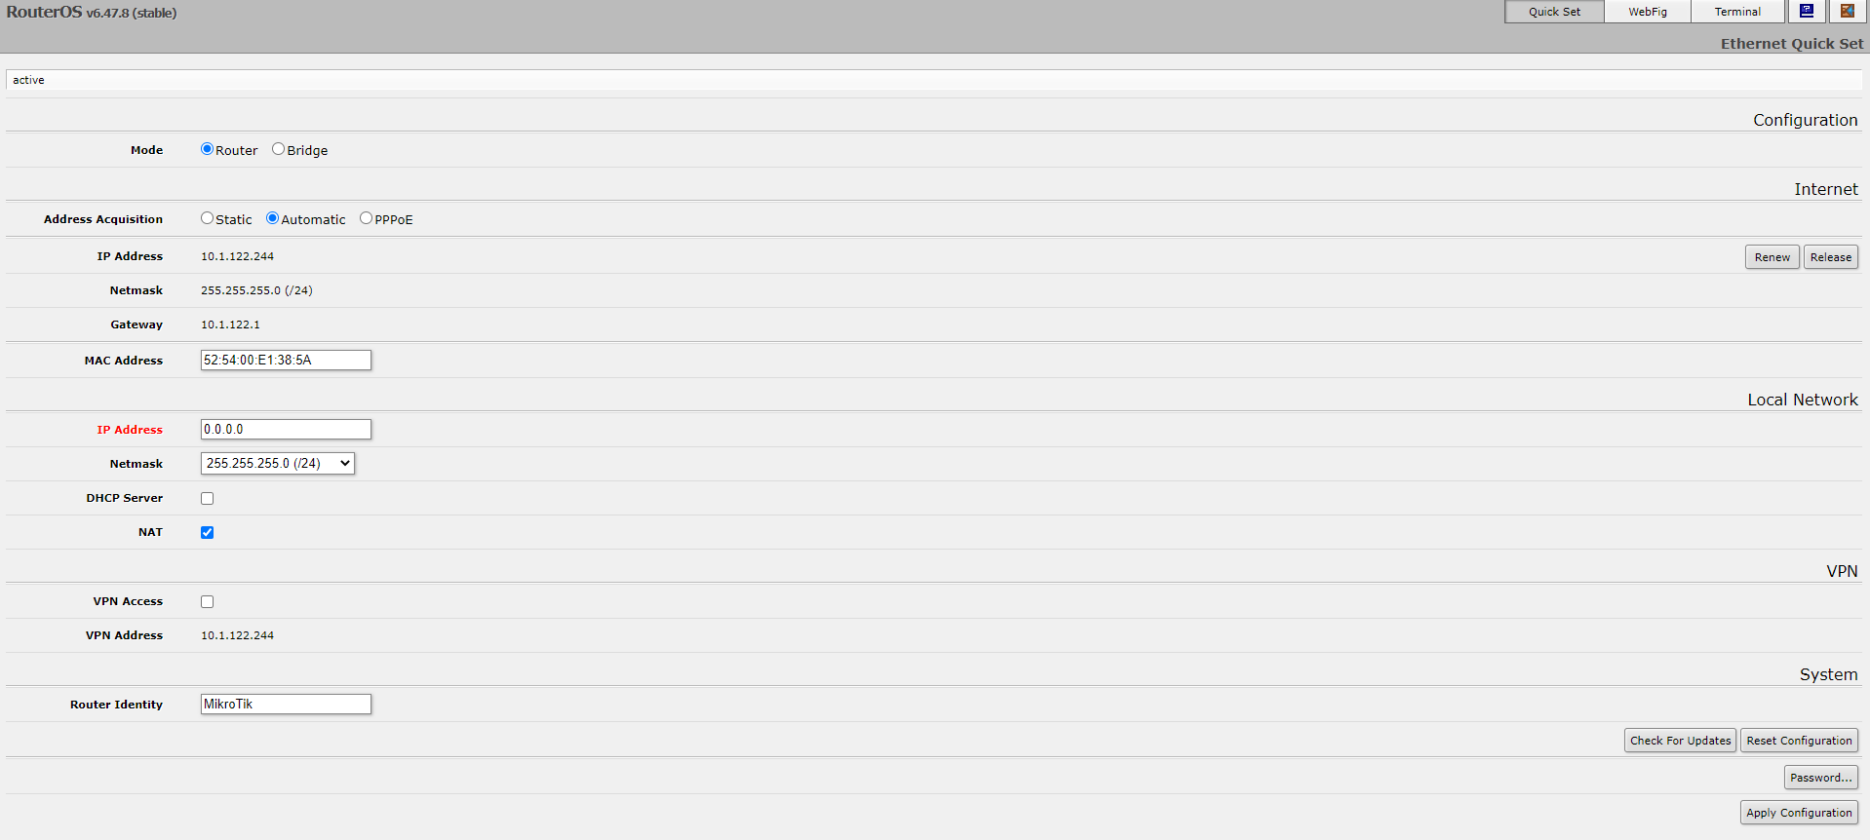
echo 1 > /proc/sys/kernel/sysrq
echo b > /proc/sysrq-trigger
Right after the reboot, RouterOS will prepare the hard drive automatically. Then we go to Mikrotik by an external IP address through the address bar of the browser. We use a standard login for admin entrance without a password. First, we need to set a password. Initially, the Mikrotik will be in the router mode, so we leave it. The Mikrotik address is automatically issued the one that was originally in the deployed VM. In the IP Address section just type your private IP address (In the example it shown as 10.1.122.244). In this menu we can also turn on the NAT function, for forwarding an external network to an internal subnet, change the name of the Mikrotik and enter the password.
Once we finished, we press the Apply Configuration. After that, we do all the basic settings either through Terminal, Webfig, or Winbox (which can be found on the manufacturer’s website https://mikrotik.com/download).